A Homeowner's Guide To Taking Apart A Kitchen Faucet
Kitchen faucets see regular and heavy use, which makes them a popular fixture to upgrade. Best of all, it is more than possible to install a new faucet yourself--provided you can get the old one out! If you would like to learn more about this common home improvement project, here is how to safely remove your old faucet from your sink.
Preparing For The Operation
Faucet removal is a relatively simple operation, yet it can require you to work in some pretty awkward positions--in other words, with your head crammed into the small cabinet space beneath your sink. Make the experience as painless as possible by taking a few minutes to clear out the area, place a folded towel to cradle the back of your head, and set up a flashlight to illuminate the bottom of the sink. Finally, you may also want to have a small bucket on hand to corral any dripping water.
Removing The Sprayer
Go ahead and turn off the two water supply valves that lead to your sink. Then turn on the two faucet handles; this will allow any standing water to thoroughly drain out of the system. Now, should your faucet include one, it's time to detach the sprayer wand's hose. This can be done using an adjustable wrench to loosen the nut you will find connecting the hose to a length of pipe extending downward from the bottom of the faucet head. Now pull the sprayer wand--and its hose--out through the top side of the sink.
Disconnecting The Supply Lines
Now it's time to disconnect the lines leading from water supply valves to faucet. Fortunately, you only need to unscrew the ends that are connected to the faucet itself; the ends connected to the valves can remain screwed into place. Should there be too little space to comfortably wield your adjustable wrench, it may be necessary to pick up a basin wrench, which makes it easy to reach line nuts located in even the tightest of recesses.
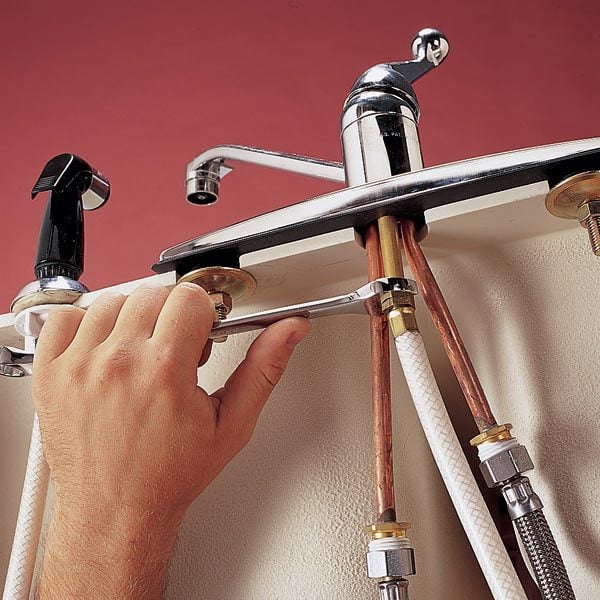
Removing The Retaining Nut
Now you have disconnected both the sprayer wand and the water supply lines. The only thing left do to before you can lift your faucet out of place is to remove the two nuts responsible for holding the faucet against the sink deck. Here you will likely find that a basin wrench provides easiest means of removal; however, you may be able to get at the nuts with an adjustable wrench.
For more information, talk to a professional plumber.